

Setup an OTT Video Streaming load test with UbikLoadPack, JMeter and AWS
Following our previous blog, we show here how to setup the massive load test using the chosen tools (UbikLoadPack, JMeter, AWS, Redline13).
The JMeter setup
The JMeter Test plan is very simple:
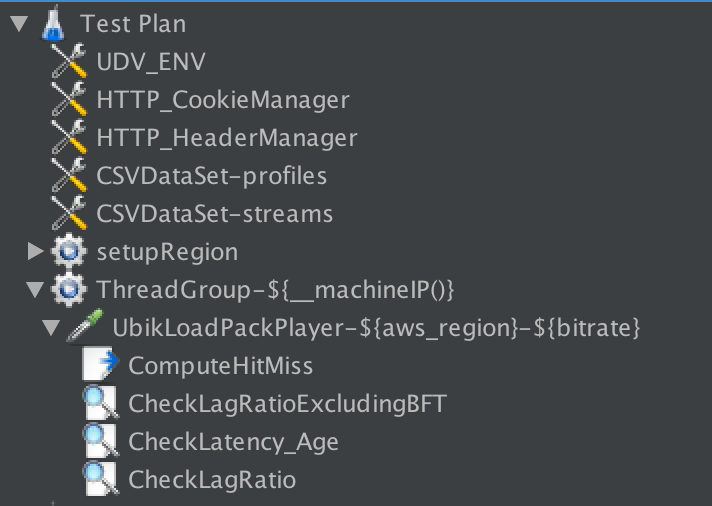
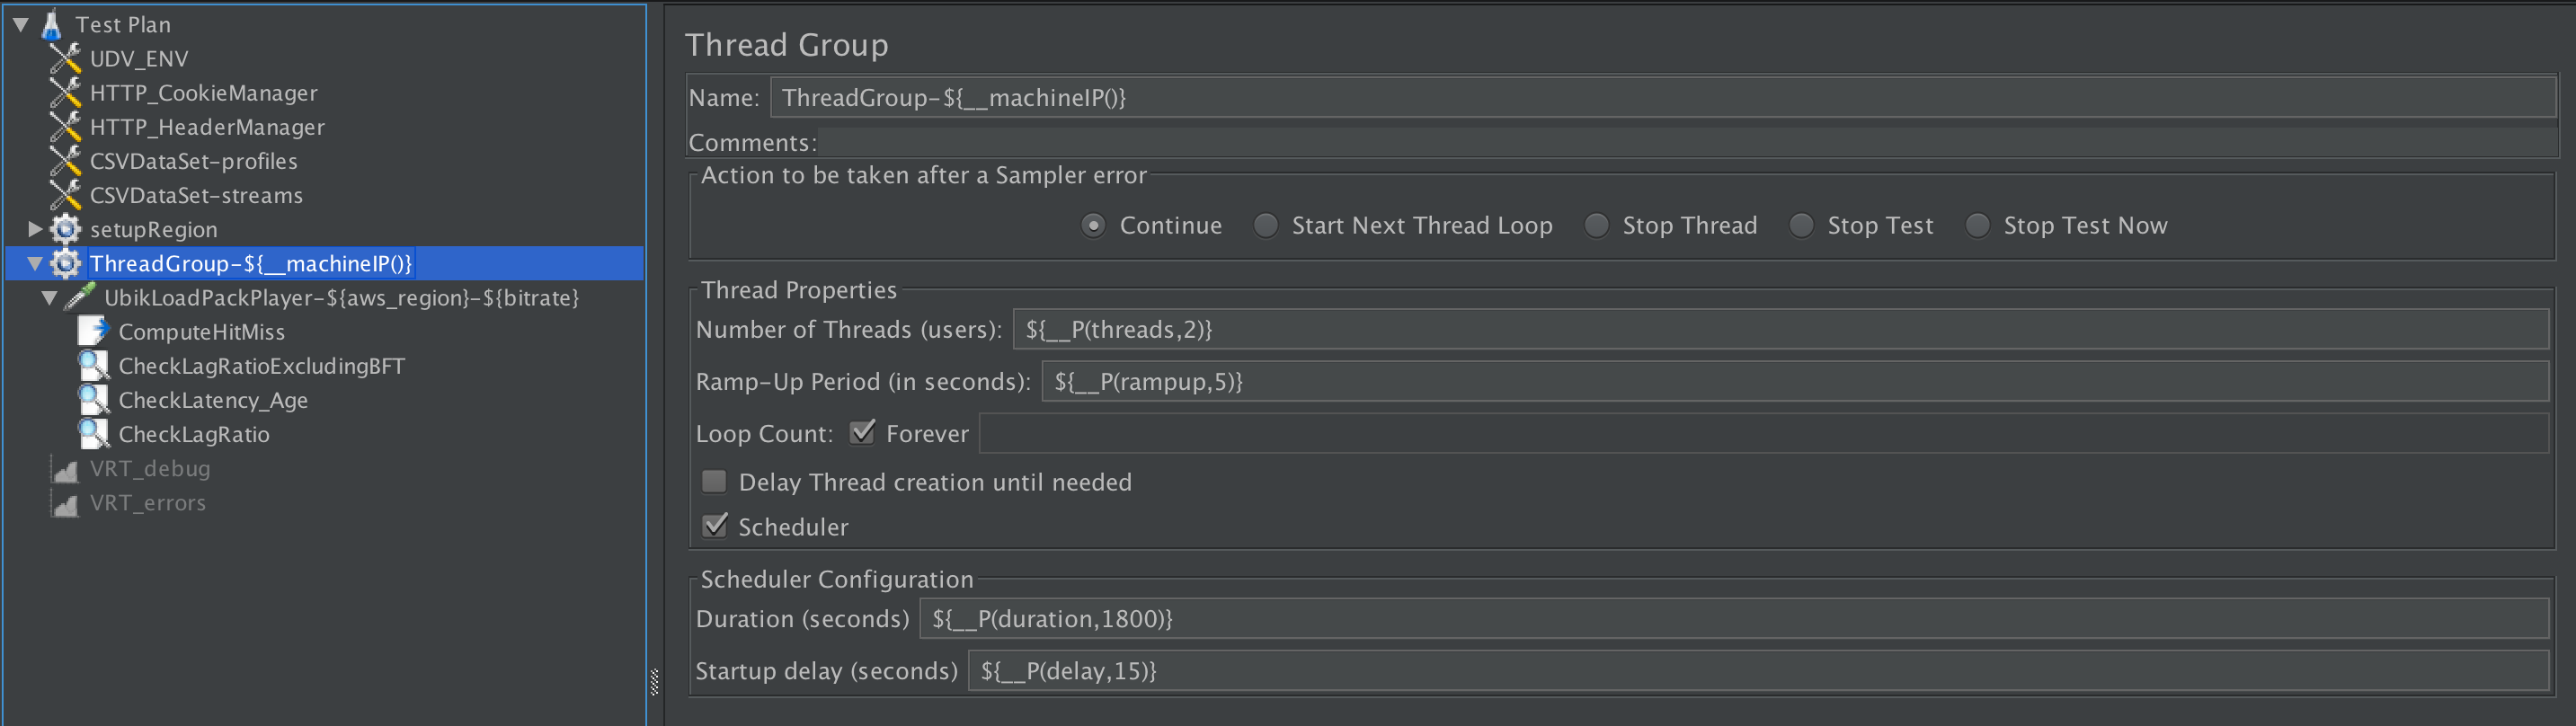
We have a Thread Group where duration, threads, rampup and startup delay have been made variable, this will allow us to control them from the Web Interface of Redline13:
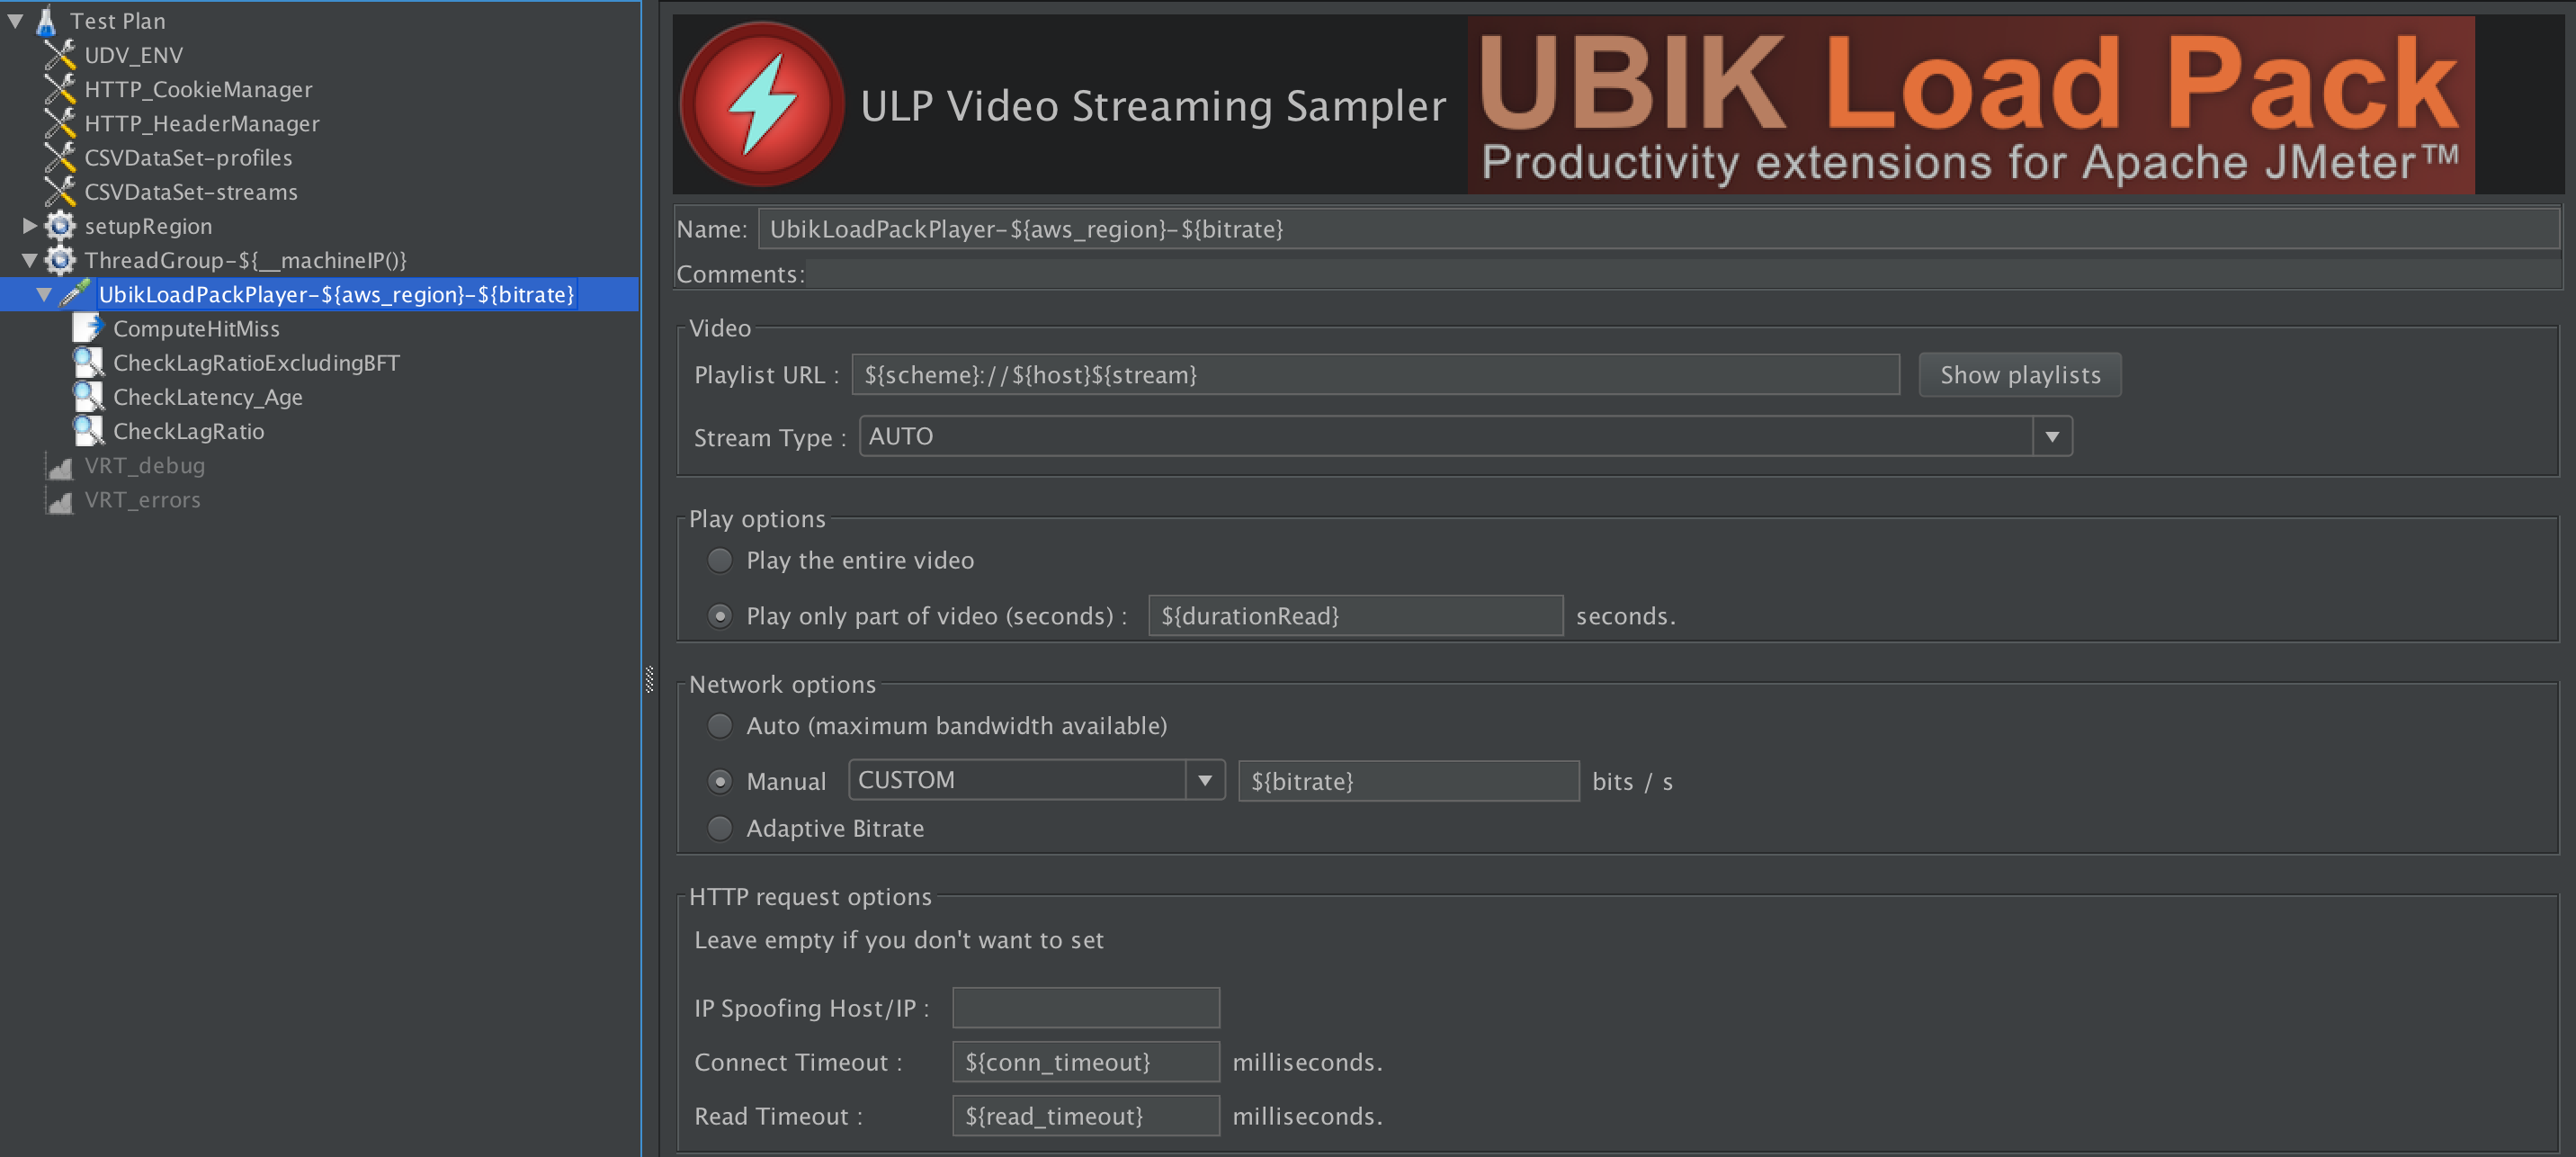
The Thread Group contains ULP Video Streaming Sampler which uses the stream and bitrate variables coming from CSVs and durationRead, conn_timeout and read_timeout defined in UDV_ENV (User Defined Variables):
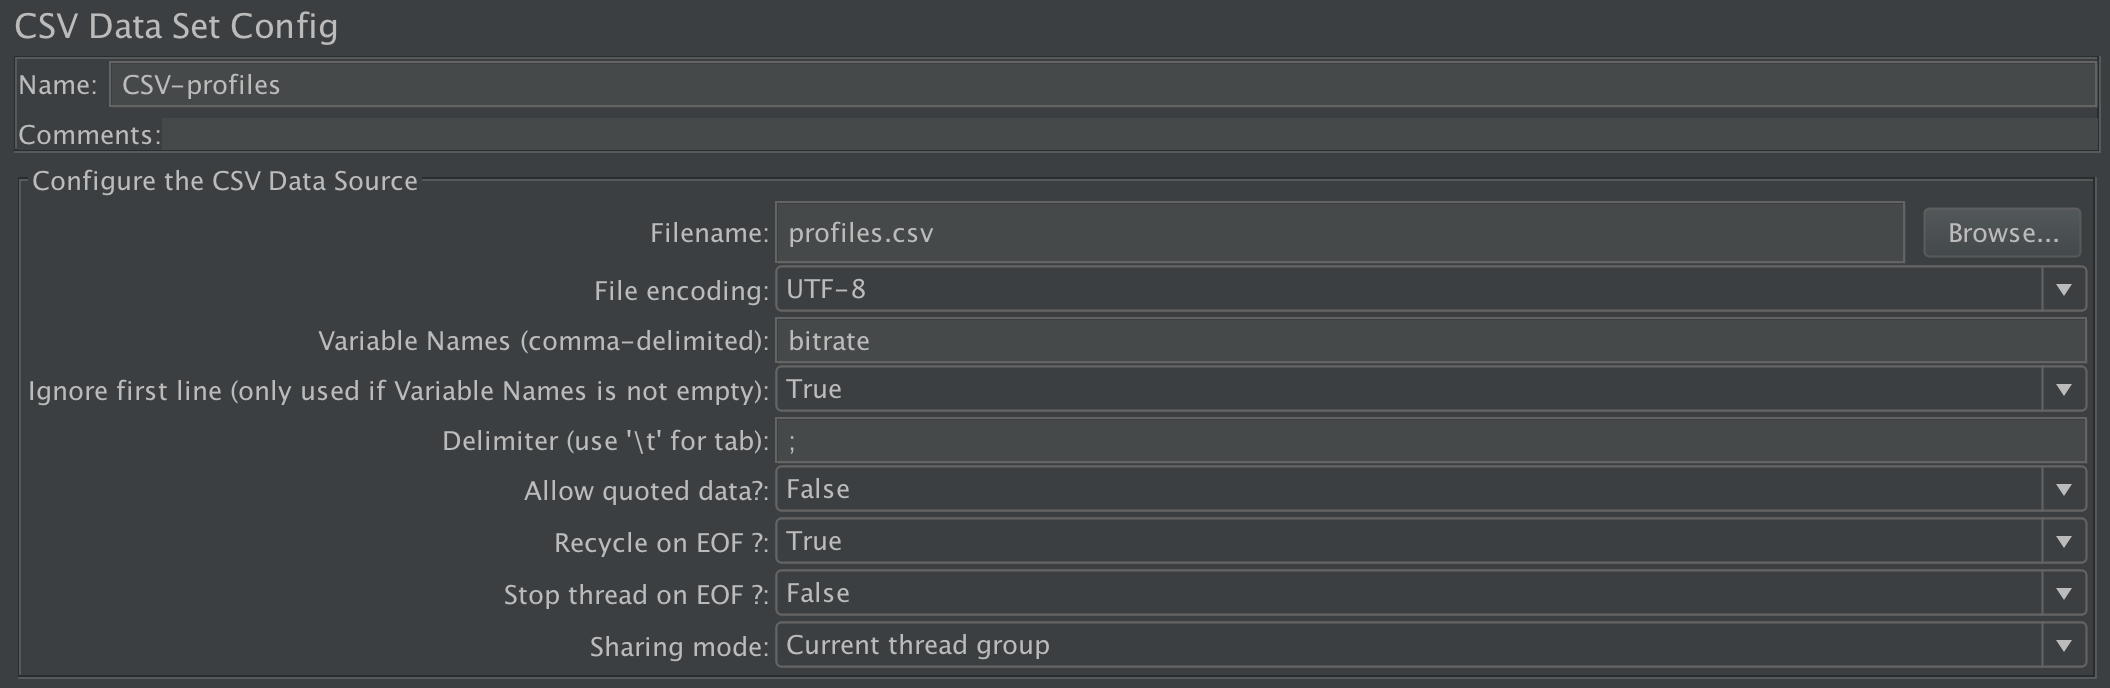
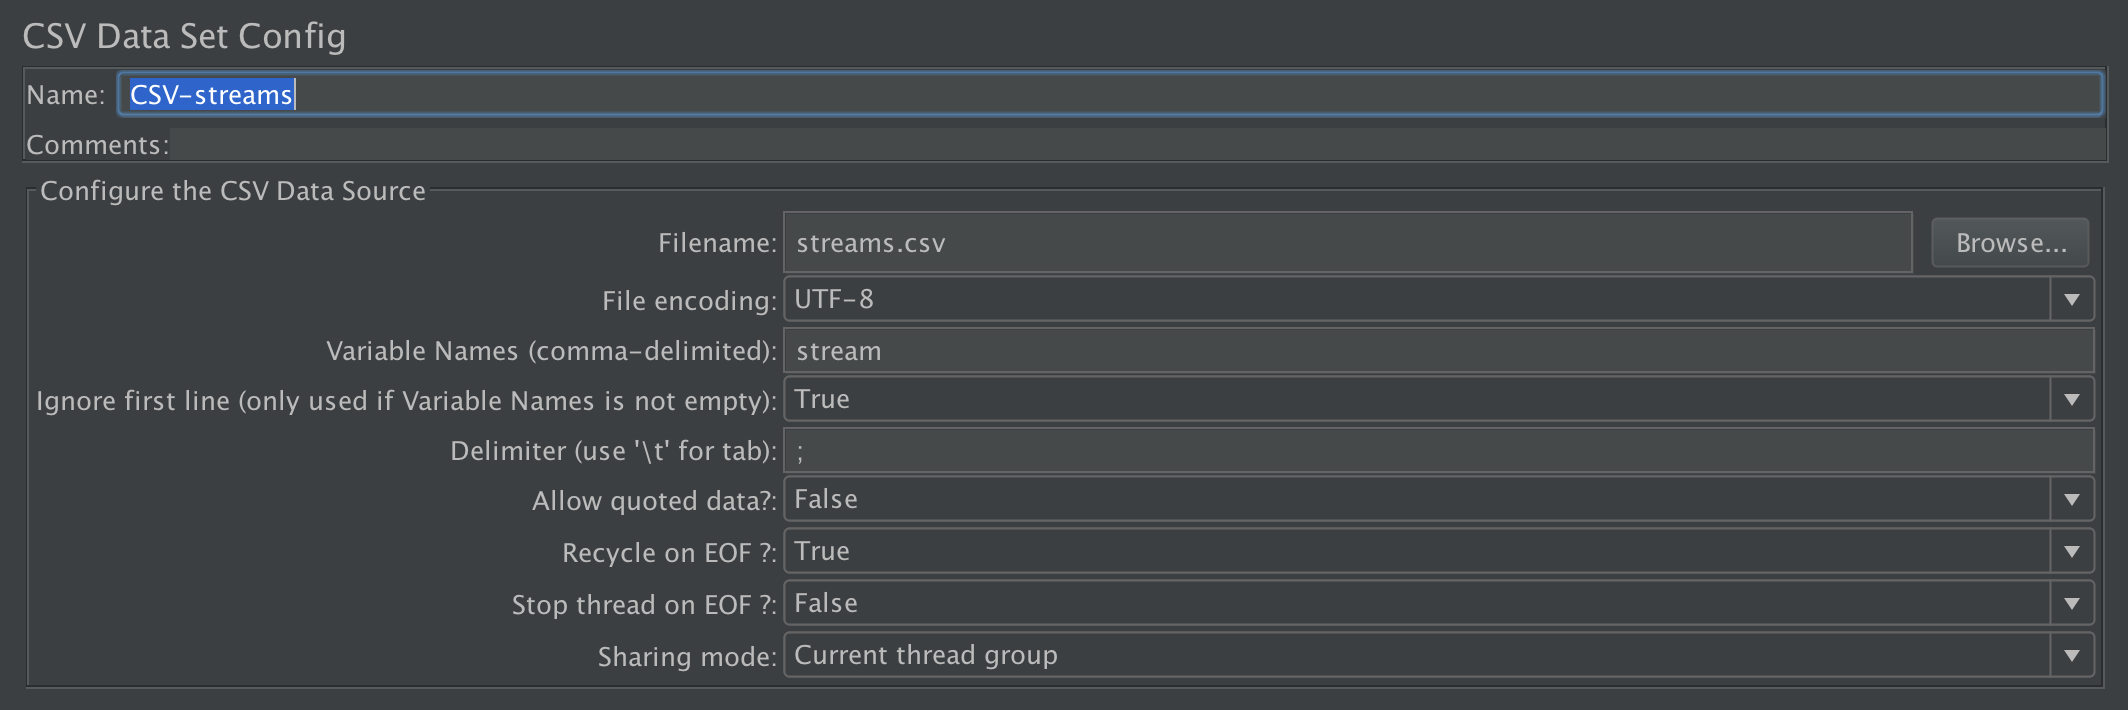
And 2 CSV files to be able to vary Streams and Bitrates:
- profiles.csv (loaded by JMeter CSV DataSet CSV-Profiles) contains the bitrates we want to test, this element will fill in ${bitrate} variable on each iteration of CSV with a different value
- streams.csv (loaded by JMeter CSV DataSet CSV-streams) contains the streams URL suffixes we want to test, this element will fill in ${stream} variable on each iteration of CSV with a different value
AWS setup
AWS setup is very easy and described here.
Redline13 Setup
Note you need a pro subscription in order to have access to some of the features described below.
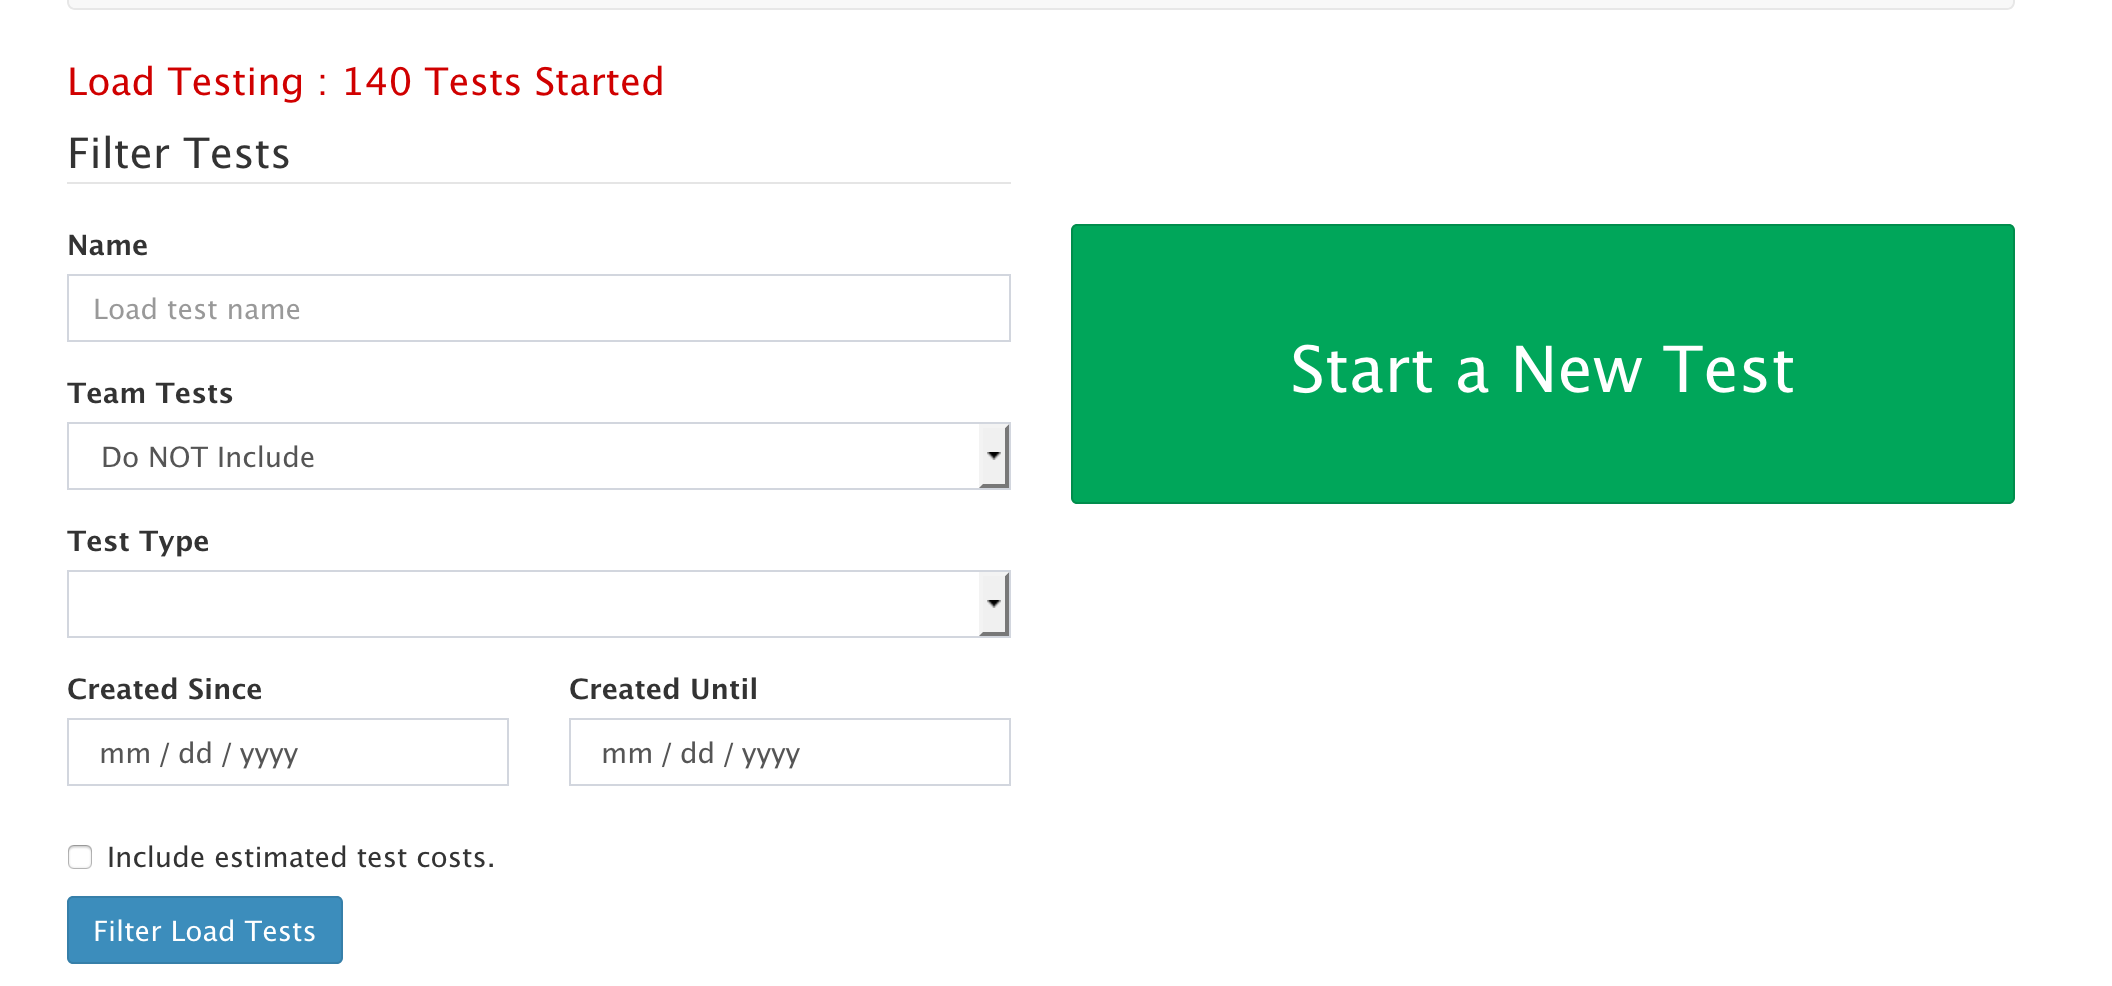
The configuration is pretty straight forward and is done in one page.
Click Start a New Test:
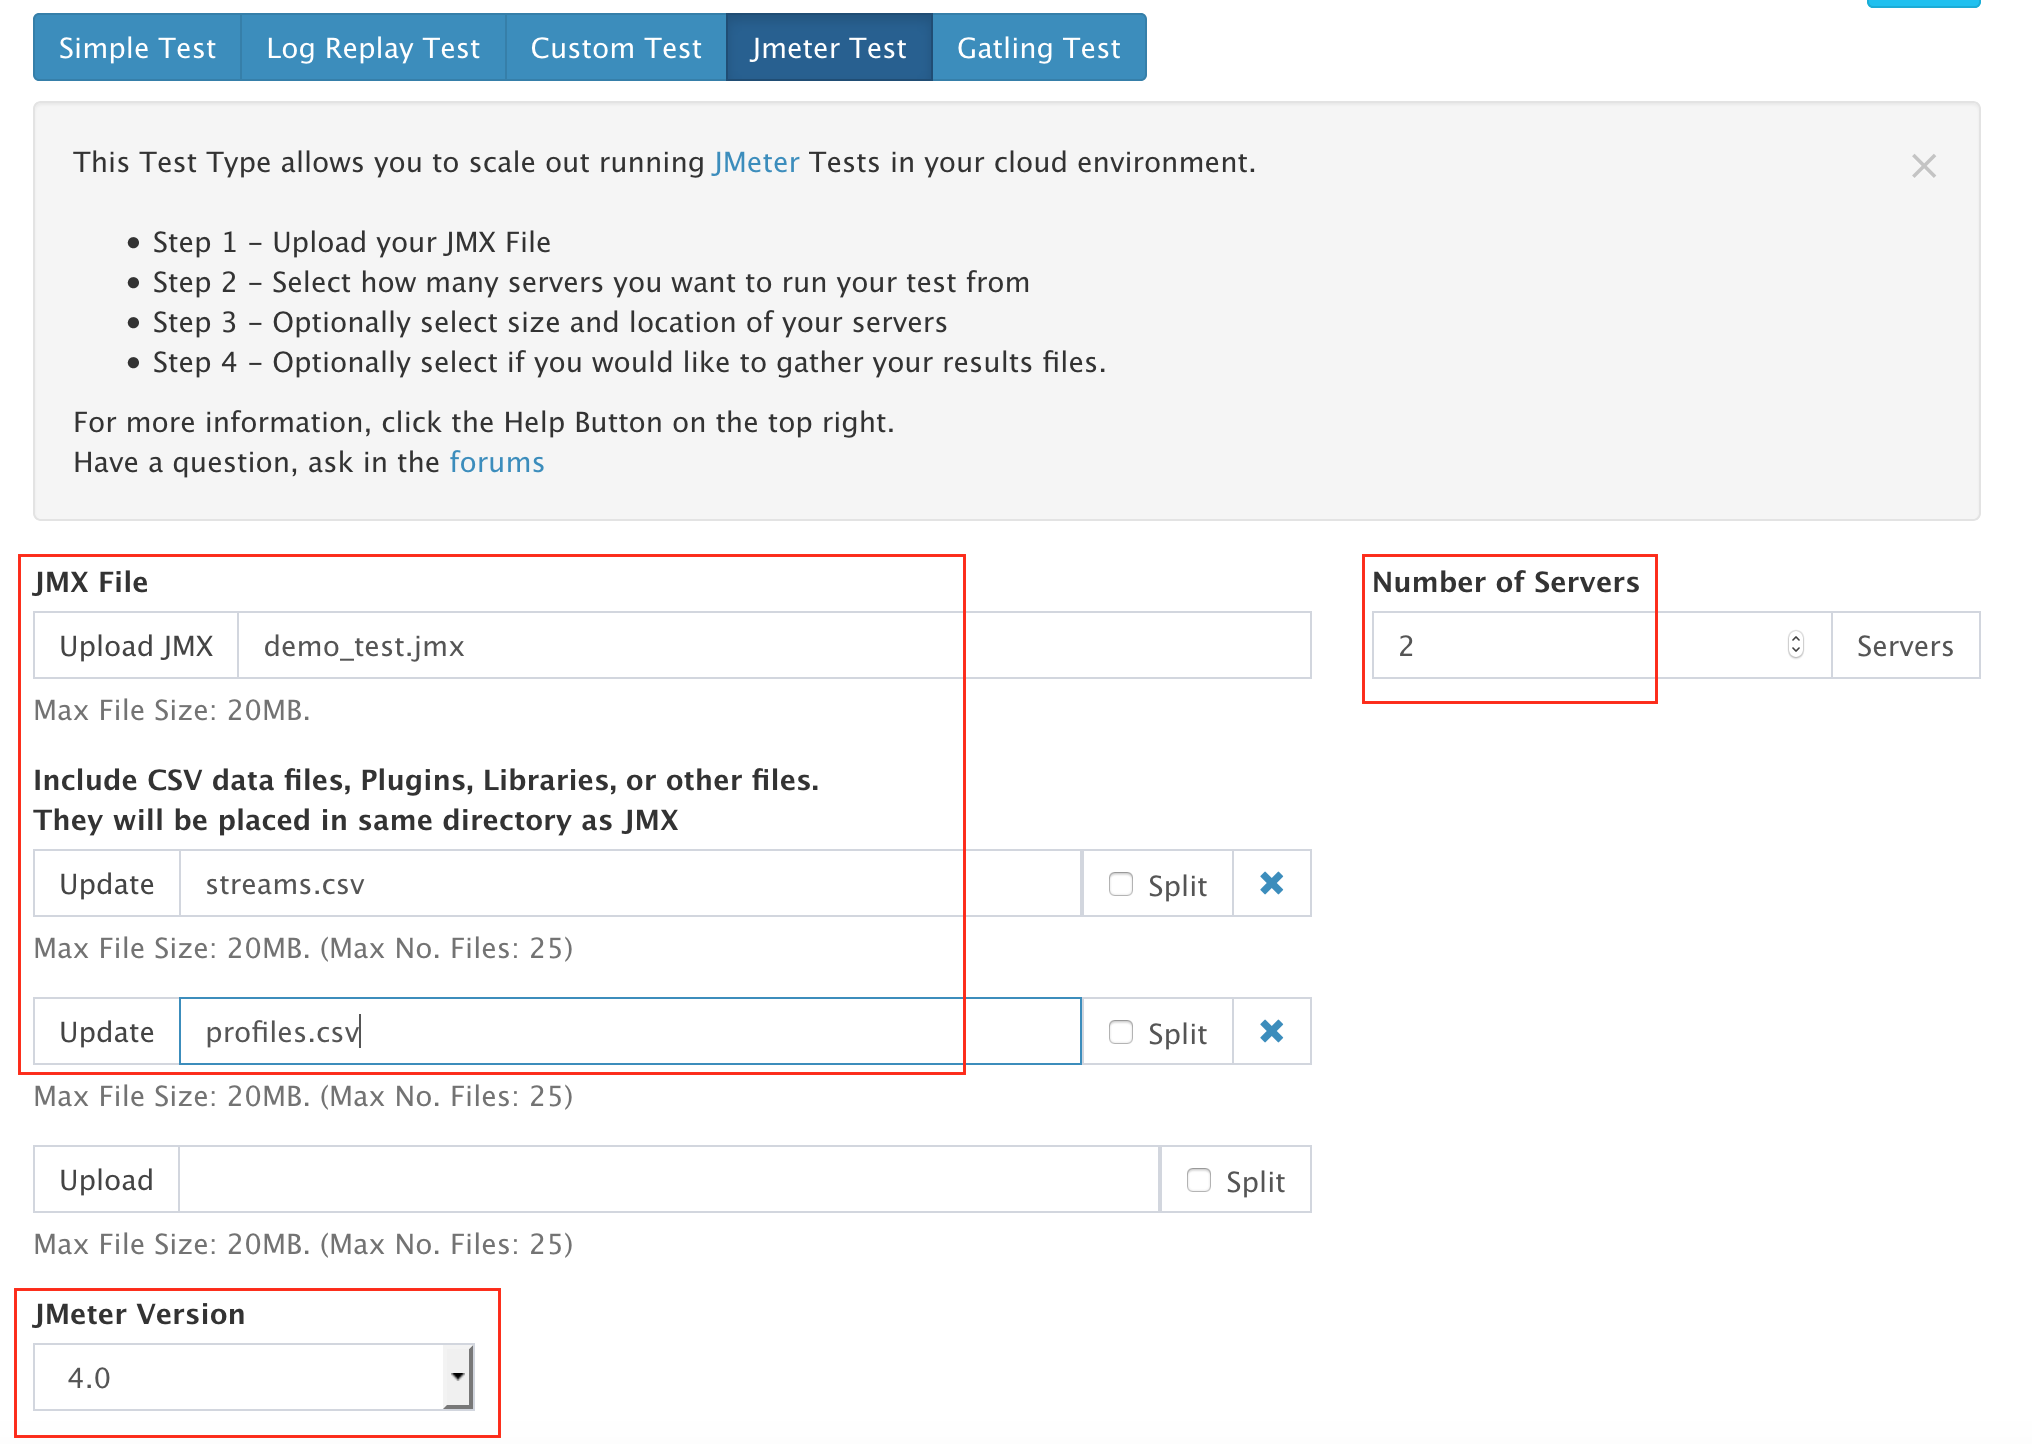
Select “Jmeter Test Tab”:
- In Upload JMX , select your JMeter jmx file
- Upload the 2 CSVs (profiles.csv and streams.csv)
- Select JMeter version (the most up to date one)
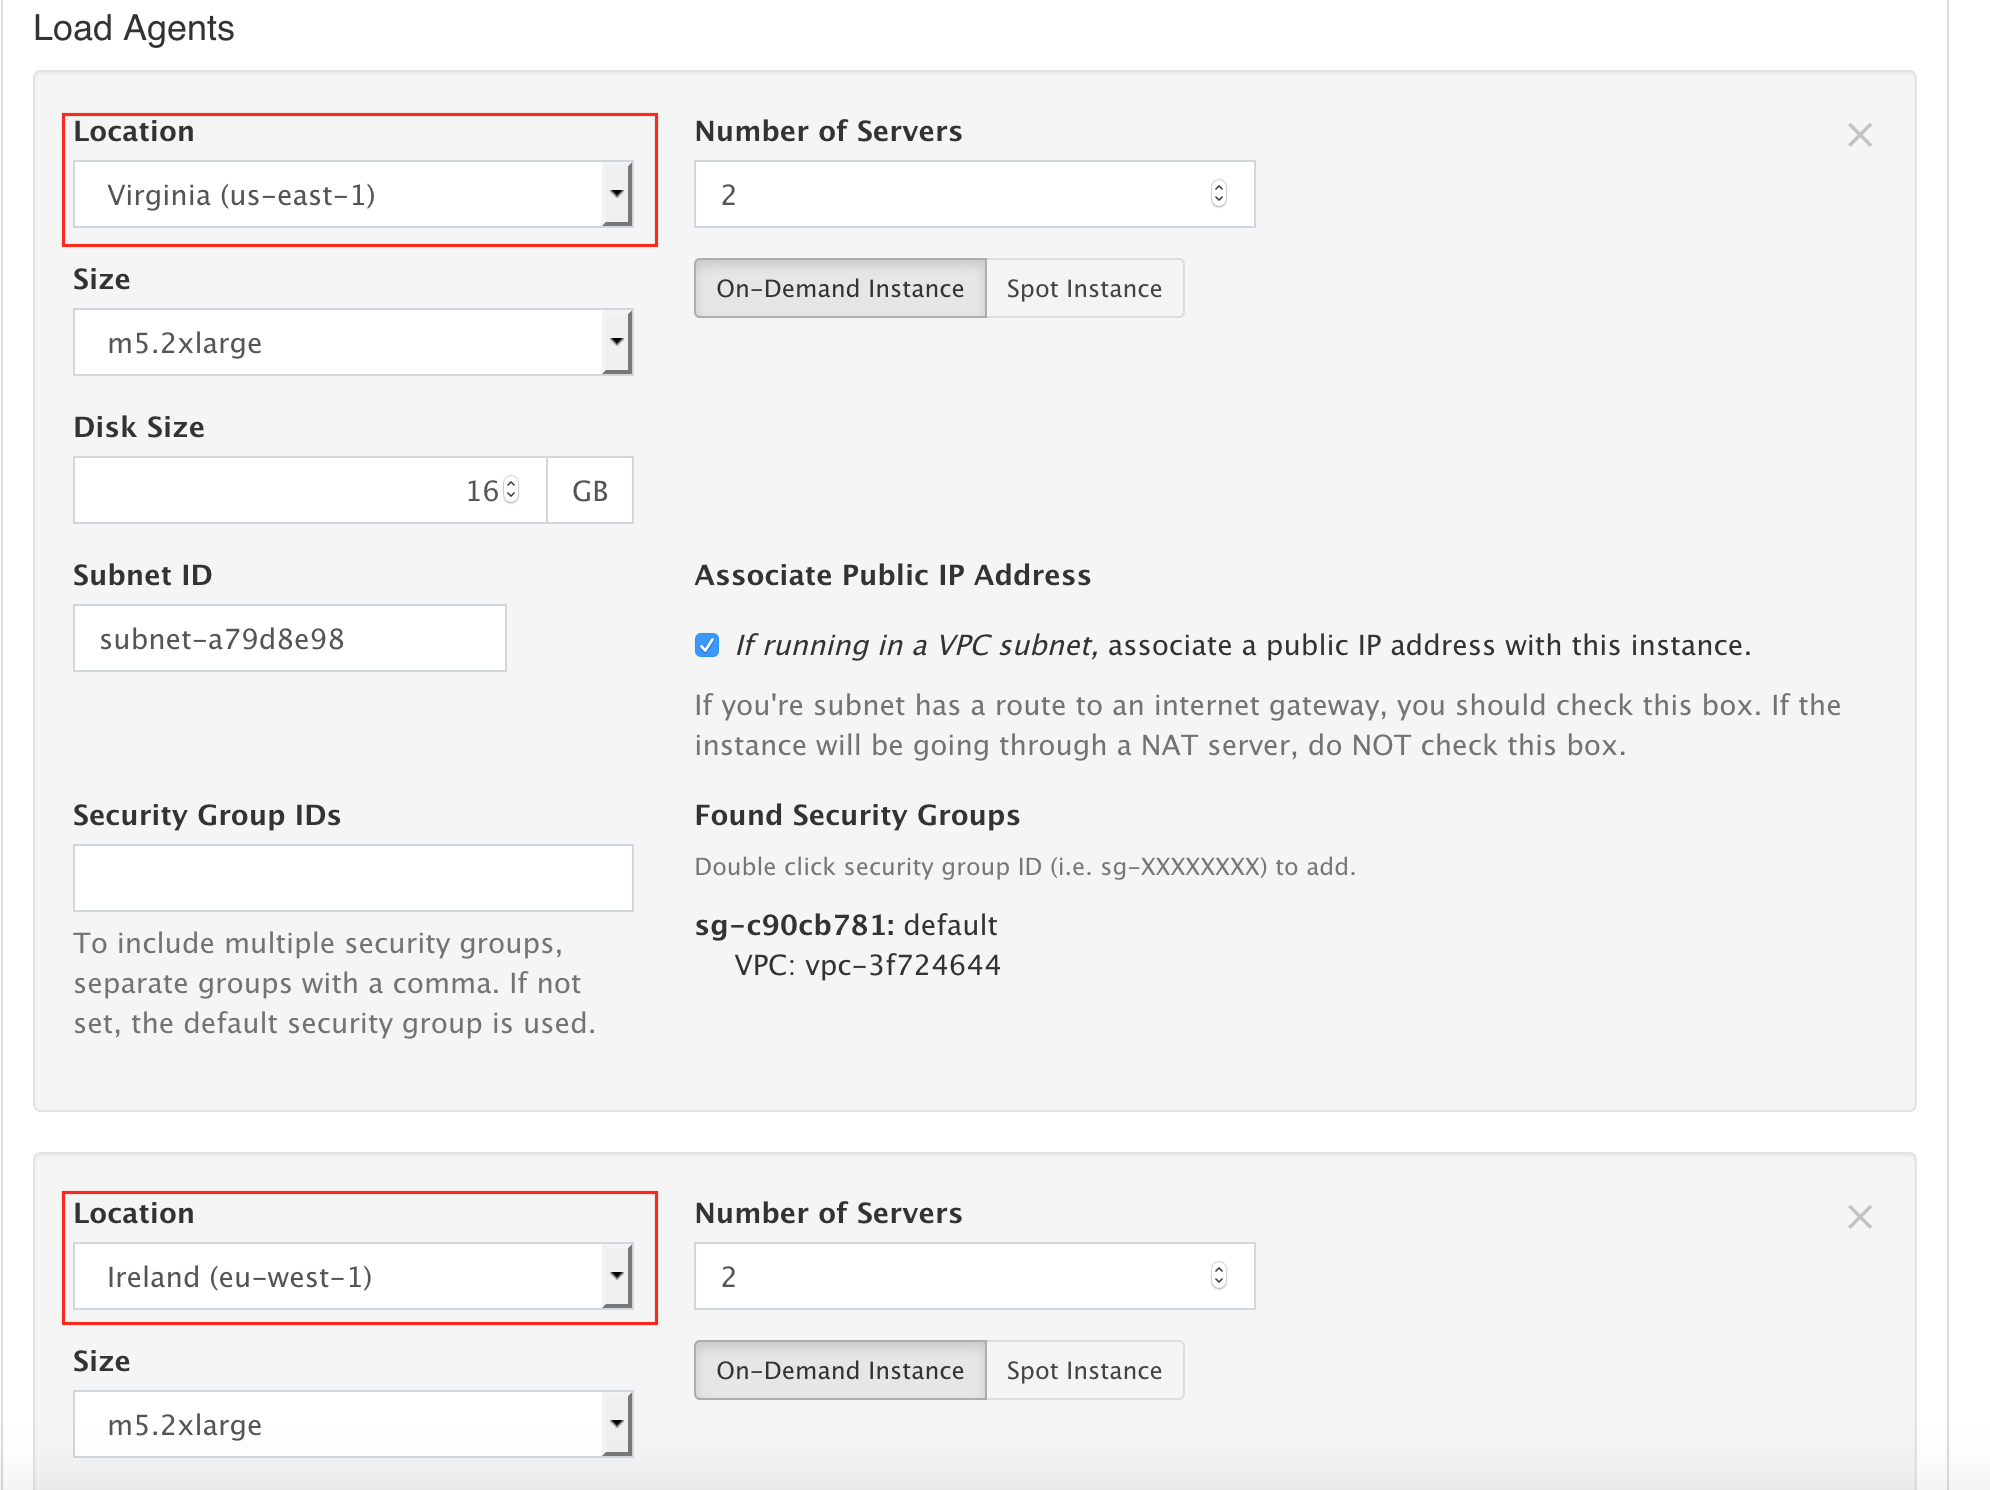
Configure “Advanced Cloud Options” options:
Ensure you fill:
- Location, in the below example we used Ireland and Virginia as a first step
- Number of servers
- Size (type of server)
- Subnet ID (just click in the field and it’s automatically filled)
In the below example we use 4 Machines:
- 2 M5.2XLARGE in Virginia
- 2 M5.2XLARGE in Ireland
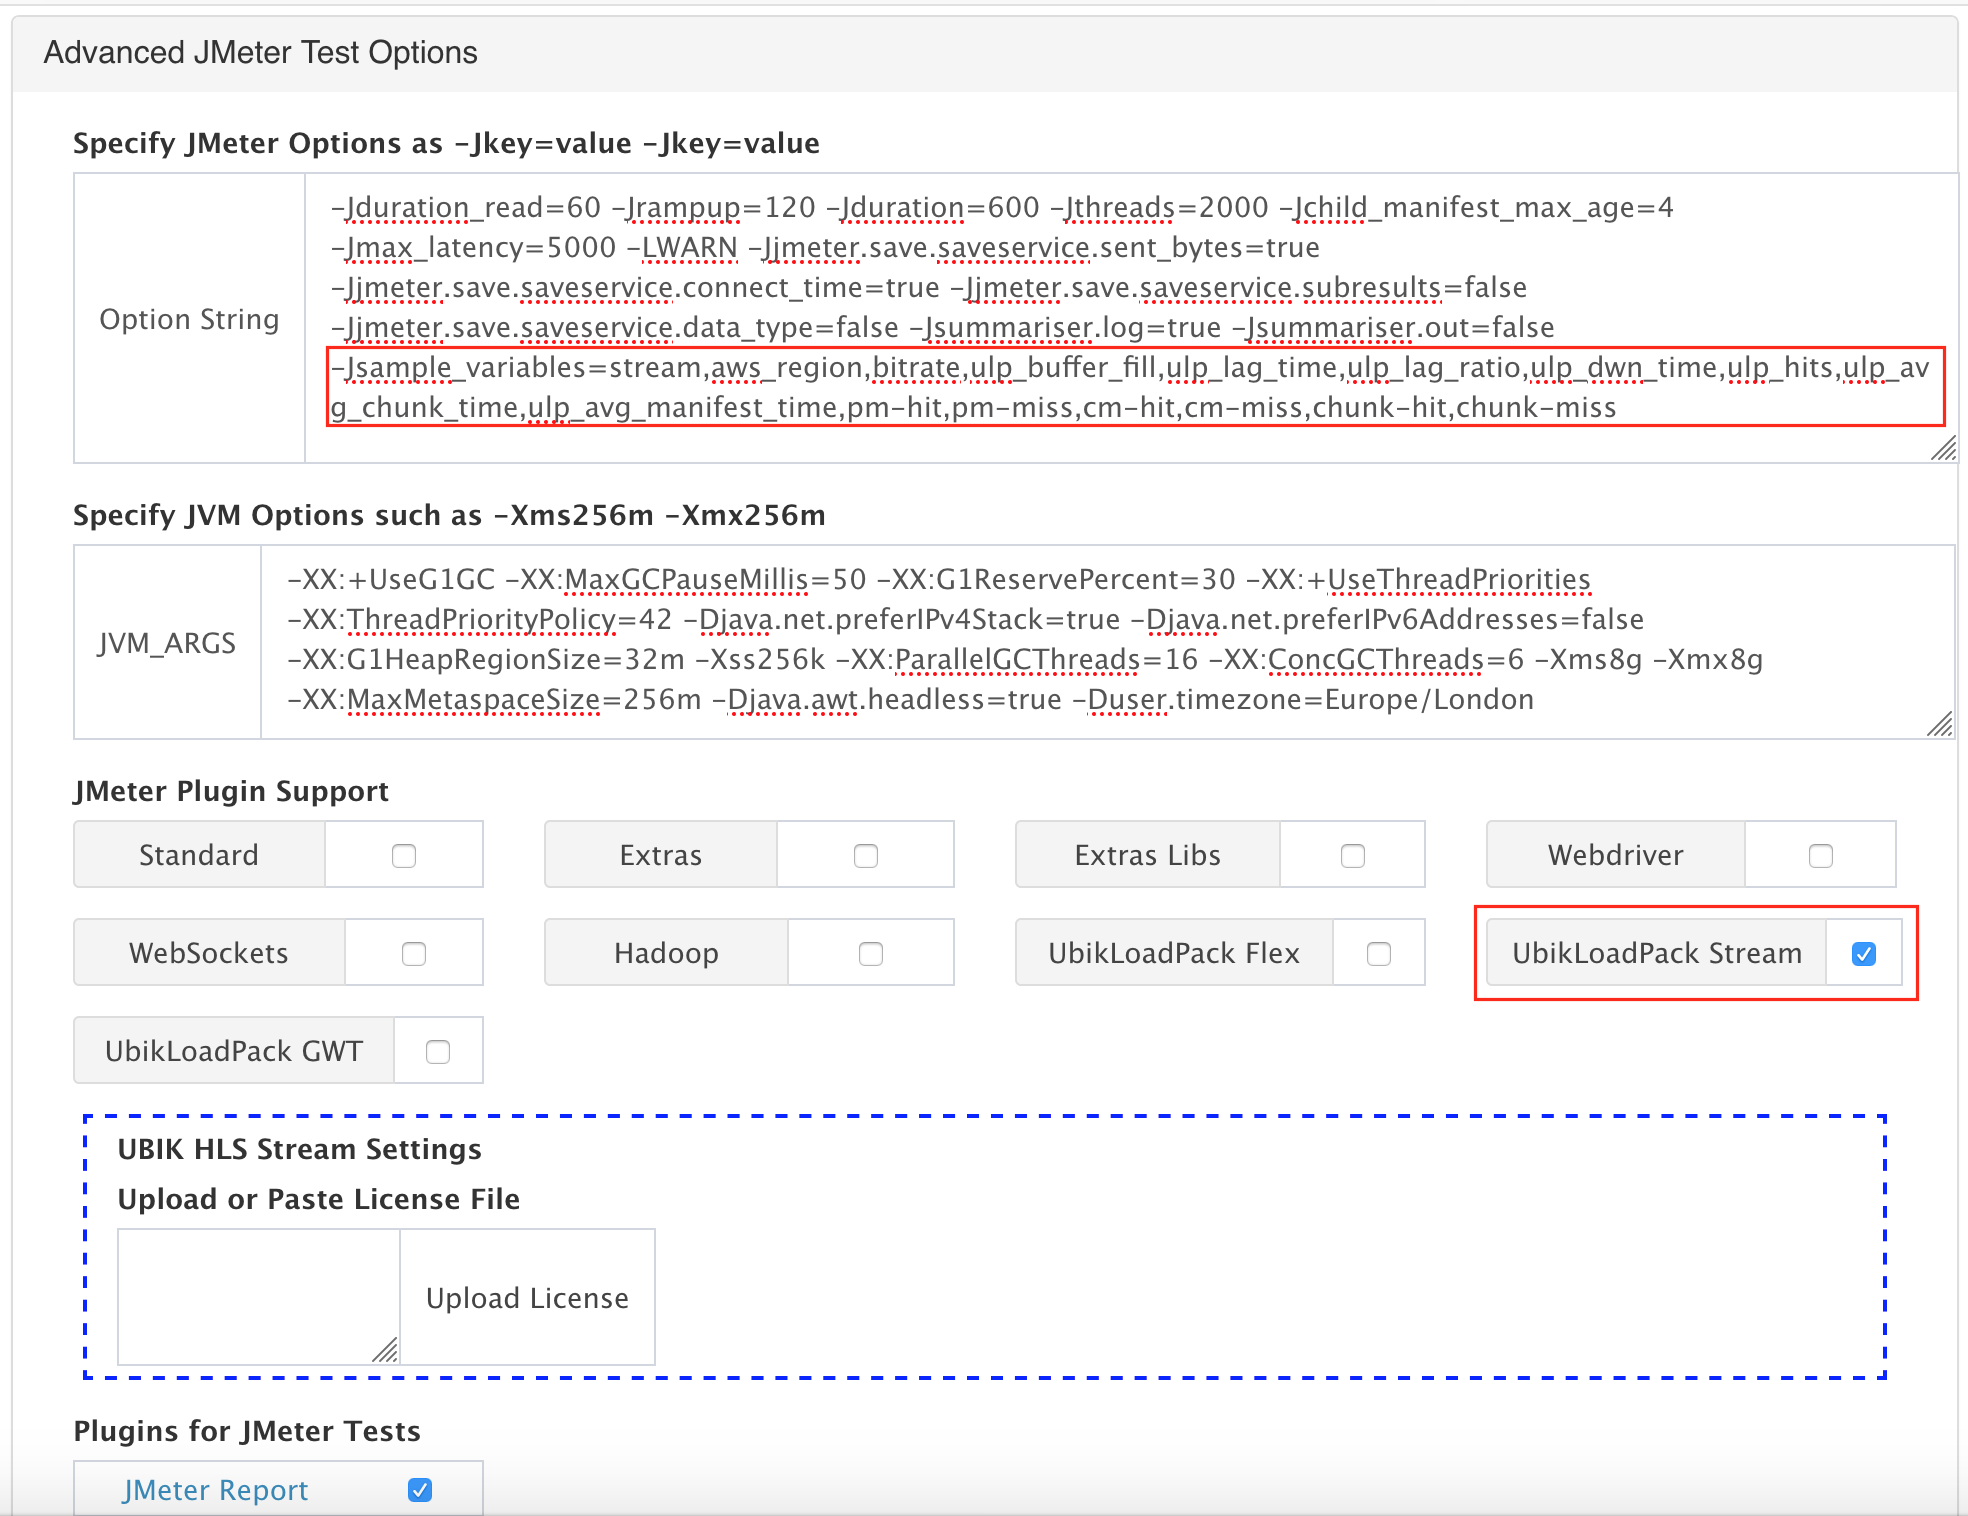
Configure “Advanced JMeter Test” options
- In “JMeter Plugin support”, check “UbikLoadPack stream” option
- Upload your license file
- Check plugin “JMeter Report”
- In “Option String” , adjust JMeter properties:
- -LWARN -Jjmeter.save.saveservice.sent_bytes=true -Jjmeter.save.saveservice.connect_time=true -Jjmeter.save.saveservice.subresults=false -Jjmeter.save.saveservice.data_type=false -Jsummariser.log=true -Jsummariser.out=false -Jsample_variables=stream,aws_region,bitrate,ulp_buffer_fill,ulp_lag_time,ulp_play_time,ulp_lag_ratio,ulp_lag_ratio_wo_bf,ulp_dwn_time,pm-hit,pm-miss,cm-hit,cm-miss,chunk-hit,chunk-miss -Jduration_read=60 -Jrampup=120 -Jduration=600 -Jthreads=1000
- In the above line , you may need to adjust parameters in bold depending on:
- Number of Players you want to simulate per machine (threads)
- Duration of your test (duration)
- Rampup of load test (rampup)
- Duration of video read in your test (duration_read property)
- Notice we have additional metrics computed in our plan based on customer requirement:
- pm-hit,pm-miss,cm-hit,cm-miss,chunk-hit,chunk-miss
- In the above line , you may need to adjust parameters in bold depending on:
- -LWARN -Jjmeter.save.saveservice.sent_bytes=true -Jjmeter.save.saveservice.connect_time=true -Jjmeter.save.saveservice.subresults=false -Jjmeter.save.saveservice.data_type=false -Jsummariser.log=true -Jsummariser.out=false -Jsample_variables=stream,aws_region,bitrate,ulp_buffer_fill,ulp_lag_time,ulp_play_time,ulp_lag_ratio,ulp_lag_ratio_wo_bf,ulp_dwn_time,pm-hit,pm-miss,cm-hit,cm-miss,chunk-hit,chunk-miss -Jduration_read=60 -Jrampup=120 -Jduration=600 -Jthreads=1000
- In JVM_ARGS, you adjust JVM options , example:
- -XX:+UseG1GC -XX:MaxGCPauseMillis=50 -XX:G1ReservePercent=30 -XX:+UseThreadPriorities -XX:ThreadPriorityPolicy=42 -Djava.net.preferIPv4Stack=true -Djava.net.preferIPv6Addresses=false -XX:G1HeapRegionSize=32m -Xss256k -Xms8g -Xmx8g -XX:MaxMetaspaceSize=256m -Djava.awt.headless=true -Duser.timezone=Europe/London
- In the above line , you may need to adjust parameters in bold depending on:
- type of AWS instance and its memory (-Xms8g -Xmx8g)
- the user timezone you want to use as reference for timestamps (-Duser.timezone=Europe/London)
Give a name to your test and click Start !
The test is now running, you can monitor it in the GUI and view while test is running:
- Request metrics (Requests per second, KB Per request, Avg response time)
- Error metrics(Errors per second, KB Per error, Error avg response time)
- Agent metrics (CPU usage, Network In/Out)
- The error table
Analyzing the test
Once your test is done, at the end of the test:
- you get an overview of your test in Summary
- you have the details of the run (JMeter and Cloud options)
- you can add Notes and comments on your test
- you can download jmeter logs from every server
- More importantly:
- you can download the HTML JMeter report generated accross all server . Note that this report will contain starting from version 5.0 of JMeter the custom graphs for :
- lag ratio
- lag ratio without buffer fill
- buffer fill
- lag time
- hits
- manifest statistics (error rate, hits, response times (percentiles), network usage)
- chunk statistics (error rate, hits, response times (percentiles), network usage)
- subtitles statistics (error rate, hits, response times (percentiles), network usage)
- you can download the merged CSV accross all server that contains the custom metrics
- you can download the HTML JMeter report generated accross all server . Note that this report will contain starting from version 5.0 of JMeter the custom graphs for :

Try it:
About UbikLoadPack :

- Ubik Load Pack is used by Big players in the Video streaming field
- We provide professional services for Load Testing
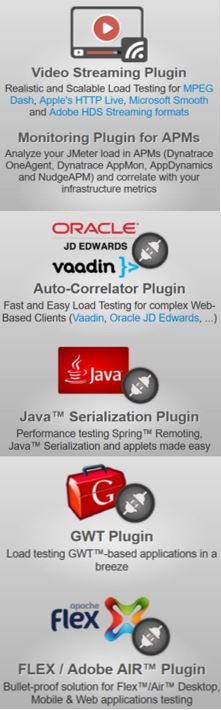
- Learn more about our streaming plugin
- Detailed features of UbikLoadPack Streaming Solution
- Get a Free trial
You’ll probably also like :
- Performance Testing Low Latency Dash servers with UbikLoadPack
- Performance Testing Low Latency HLS servers
- Load testing MPEG-DASH Video Streaming with Apache JMeter and UbikLoadPack
- Video Streaming: CMAF and Low-Latency
- Cases studies
Other links:
- Load Testing Smooth Streaming Video with JMeter
- Load testing MPEG-DASH Video Streaming with Apache JMeter and UbikLoadPack
- Load testing HLS Video Streaming with JMeter and UbikLoadPack
- Business Case from the OTT sector
UbikLoadPack solution

![]()
Publication
![]()
