Ubik Batch Server Installation Guide
From UbikWiki
m (minor changes) |
|||
Line 3: |
Line 3: | ||
== Requirements == | == Requirements == | ||
=== JDK === | === JDK === | ||
| - | First install a JDK 5 or an upper version: | + | First install a |
| + | JDK 5 or an upper version: | ||
* Install only JDK (JRE, demo and source code are not necessary) [http://java.sun.com/javase/downloads/index_jdk5.jsp http://java.sun.com/javase/downloads/index_jdk5.jsp] | * Install only JDK (JRE, demo and source code are not necessary) [http://java.sun.com/javase/downloads/index_jdk5.jsp http://java.sun.com/javase/downloads/index_jdk5.jsp] | ||
| - | * Install | + | * Install it in the directory of your choice, the location will be further referenced as <nowiki><JAVA_HOME></nowiki> |
The installation procedure requires the following elements: | The installation procedure requires the following elements: | ||
Line 18: |
Line 19: | ||
== Batch Server Installation steps == | == Batch Server Installation steps == | ||
=== Create the Database === | === Create the Database === | ||
| - | Play the script adapted to | + | Play the script adapted to your database. Supported databases are: |
* DB2 | * DB2 | ||
* Oracle 9i | * Oracle 9i | ||
Line 58: |
Line 59: | ||
Fill in: | Fill in: | ||
* JNDI Name of the console: Path where the Batch server will be installed | * JNDI Name of the console: Path where the Batch server will be installed | ||
| - | * Port of the Naming Service: Check the chosen port is free (netstat -a) | + | * Port of the Naming Service: Check if the chosen port is free (netstat -a) |
| - | * Port of the JMX Service: Check the chosen port is free (netstat -a) | + | * Port of the JMX Service: Check if the chosen port is free (netstat -a) |
[[Image:image006.jpg|center]] | [[Image:image006.jpg|center]] | ||
Line 71: |
Line 72: | ||
==== Step 7: Embedded BAR Server Configuration ==== | ==== Step 7: Embedded BAR Server Configuration ==== | ||
| - | This step | + | This step is for configuring the BAR Upload server that is shipped inside the Batch Server. This server receives BARs that are sent by the Batch Admin Web Application |
Fill in: | Fill in: | ||
* BARs upload folder : Folder where the BARs will be stored temporarily and then deployed | * BARs upload folder : Folder where the BARs will be stored temporarily and then deployed | ||
| - | * BAR Server Port: Port of the server (check the port is not used) | + | * BAR Server Port: Port of the server (check if the port is not used) |
[[Image:image008.jpg|center]] | [[Image:image008.jpg|center]] | ||
==== Step 8: Batch Server Logging Folder ==== | ==== Step 8: Batch Server Logging Folder ==== | ||
| - | This step | + | This step is for configuring the Root Folder for Logs. This folder will be further referenced as a JVM property called LOG_ROOT_PATH |
Fill in: | Fill in: | ||
* Logging directory | * Logging directory | ||
[[Image:image009.jpg|center]] | [[Image:image009.jpg|center]] | ||
==== Step 9: Mailer configuration ==== | ==== Step 9: Mailer configuration ==== | ||
| - | This step | + | This step is for configuring the Mail notification system. Each time an error occurs a mail will be sent using the configured parameters. |
| + | |||
Fill in: | Fill in: | ||
* Host of the mailer: Host of the Mail server | * Host of the mailer: Host of the Mail server | ||
Line 91: |
Line 93: | ||
[[Image:image010.jpg|center]] | [[Image:image010.jpg|center]] | ||
==== Step 10 : Environment parameters ==== | ==== Step 10 : Environment parameters ==== | ||
| - | This step | + | This step is for configuring environment parameters, it will generate a setenv.bat (for Windows) and setenv.sh (for Linux) |
| + | |||
Fill in: | Fill in: | ||
| - | * Name of the NT service (Identifies the NT service) (Used only | + | * Name of the NT service (Identifies the NT service) (Used only on Windows operating system) |
* JAVA_HOME: It must be a JDK 5 | * JAVA_HOME: It must be a JDK 5 | ||
* JVM options: You may change –Xmx and –Xms and add other properties. | * JVM options: You may change –Xmx and –Xms and add other properties. | ||
Line 116: |
Line 119: | ||
=== Installing from properties file === | === Installing from properties file === | ||
| - | You have another option if you don’t want to re seize all options on each installation. | + | You have another option if you don’t want to re seize all options on each installation. After each installation, a file called “ant.install.properties” is writed. This file contains all seized properties. |
| - | + | For using this properties file “ant.install.properties” for further installations you have to copy it in the folder from which you launch the installer. | |
To make the installer use it: | To make the installer use it: | ||
Line 355: |
Line 358: | ||
{| class="prettytable" | {| class="prettytable" | ||
| - | | | + | | Parameter |
| Description | | Description | ||
| Default Value | | Default Value | ||
Line 418: |
Line 421: | ||
Example: | Example: | ||
| - | If | + | If your BAR_ID is “STCOM_BATCH”, you will put a file called STCOM_BATCH-binding.xml that contains: |
<source lang="xml" > | <source lang="xml" > | ||
<?xml version="1.0" encoding="UTF-8"?> | <?xml version="1.0" encoding="UTF-8"?> | ||
Line 430: |
Line 433: | ||
= Batch Administration Webapp: = | = Batch Administration Webapp: = | ||
| - | This explains the installation of the | + | This section explains the installation of the Web application that controls one or more Batch Servers. |
The application comes as a standard EAR to deploy on J2EE 1.3 or J2EE 1.4 server. | The application comes as a standard EAR to deploy on J2EE 1.3 or J2EE 1.4 server. | ||
Line 440: |
Line 443: | ||
== Database configuration: == | == Database configuration: == | ||
=== Create the Database === | === Create the Database === | ||
| - | + | Run the script adapted to your database, all databases supported by Hibernate can be used: | |
* DB2 | * DB2 | ||
* Oracle 9i | * Oracle 9i | ||
Line 449: |
Line 452: | ||
* ... | * ... | ||
| - | + | Run the following script in the Database of BatchAdmin: | |
<source lang="sql"> | <source lang="sql"> | ||
INSERT INTO parameter(par_context, par_id, par_value, par_description, par_date_upd, par_user_upd, par_date_crt, par_user_crt) | INSERT INTO parameter(par_context, par_id, par_value, par_description, par_date_upd, par_user_upd, par_date_crt, par_user_crt) | ||
Line 461: |
Line 464: | ||
</source> | </source> | ||
| - | Where <nowiki><PATH TO BAR UPLOAD DIRECTORY></nowiki> is the path to a | + | Where <nowiki><PATH TO BAR UPLOAD DIRECTORY></nowiki> is the path to a directory where BARs will be uploaded before deployment on servers (This is NOT the same one as the directory used by the BATCH Server) |
== Available roles == | == Available roles == | ||
Line 488: |
Line 491: | ||
| MANAGE_CONSOLES | | MANAGE_CONSOLES | ||
| ADMINISTRATOR | | ADMINISTRATOR | ||
| - | | Add, Remove,Update a Console connection in the BatchAdmin application and Start/Stop a Server | + | | Add, Remove, Update a Console connection in the BatchAdmin application and Start/Stop a Server |
|- | |- | ||
Line 579: |
Line 582: | ||
|- | |- | ||
| jdbc/cbsecurity | | jdbc/cbsecurity | ||
| - | | This pool is used by the internal rights management system, optional if other system is used | + | | This pool is used by the internal rights management system, optional if an other security system is used |
|} | |} | ||
Revision as of 11:34, 11 April 2009
Requirements
JDK
First install a
JDK 5 or an upper version:
- Install only JDK (JRE, demo and source code are not necessary) http://java.sun.com/javase/downloads/index_jdk5.jsp
- Install it in the directory of your choice, the location will be further referenced as <JAVA_HOME>
The installation procedure requires the following elements:
- LAST_VERSION\installer\console-install-pack-5.0.0.x.jar
- LAST_VERSION\scripts-sql\schema-<DatabaseType>.ddl
Database
You must have a dedicated schema to the repository server.
- All databases supported by Hibernate can be used.
- A repository may be used by more than one Batch Server since a unique ID is associated to each server.
Batch Server Installation steps
Create the Database
Play the script adapted to your database. Supported databases are:
- DB2
- Oracle 9i
- Oracle 10G
- Sql Server 2005
- Postgres 8.x.x
- MySQL
- ...
Launch the installer
Run the following command line:
<JAVA_HOME>/bin/java –jar <Path_To_Installer>/ubik-server-installer-<VERSION>.jar
This screen will appear
Step 1 (Logo screen)
- Click on next
Step 2 (Copyright screen)
- Click on next
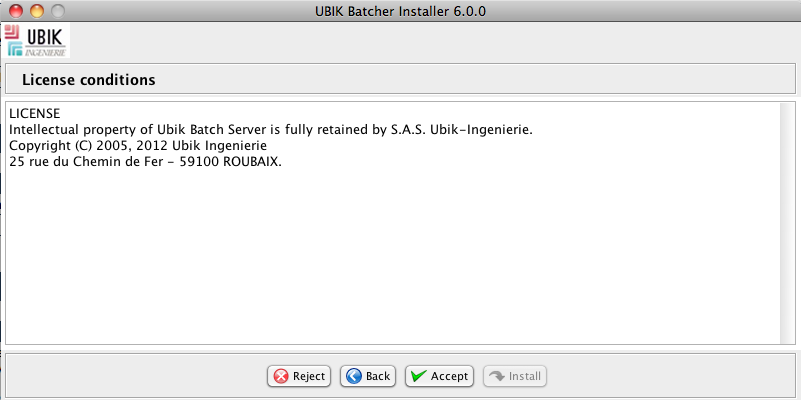
Step 3 (License screen)
- Click on accept
Step 4: Installation Options
Fill in:
- Installation Directory: Path where the Batch server will be installed
- ID of the console: This ID must be unique and will be used in database to identify uniquely the Server Batches,…
Step 5: JMX Connectivity
Fill in:
- JNDI Name of the console: Path where the Batch server will be installed
- Port of the Naming Service: Check if the chosen port is free (netstat -a)
- Port of the JMX Service: Check if the chosen port is free (netstat -a)
Step 6: Server Repository Database parameters
Fill in:
- DB User: User of the Server Repository Database
- DB Password: Password of the Server Repository Database
- Class of the JDBC Driver
- URL of the JDBC Connection (ex : jdbc:oracle:thin:@<Host>:<Port>:<Instance>)
Step 7: Embedded BAR Server Configuration
This step is for configuring the BAR Upload server that is shipped inside the Batch Server. This server receives BARs that are sent by the Batch Admin Web Application Fill in:
- BARs upload folder : Folder where the BARs will be stored temporarily and then deployed
- BAR Server Port: Port of the server (check if the port is not used)
Step 8: Batch Server Logging Folder
This step is for configuring the Root Folder for Logs. This folder will be further referenced as a JVM property called LOG_ROOT_PATH Fill in:
- Logging directory
Step 9: Mailer configuration
This step is for configuring the Mail notification system. Each time an error occurs a mail will be sent using the configured parameters.
Fill in:
- Host of the mailer: Host of the Mail server
- Port of the mailer: Port of the Mail server (defaults to 25)
- Name of the mailer : Name the will appear in Mails
- Mail of administrator: Mail of the technical administrator (used only if XML storage is chosen)
Step 10 : Environment parameters
This step is for configuring environment parameters, it will generate a setenv.bat (for Windows) and setenv.sh (for Linux)
Fill in:
- Name of the NT service (Identifies the NT service) (Used only on Windows operating system)
- JAVA_HOME: It must be a JDK 5
- JVM options: You may change –Xmx and –Xms and add other properties.
Set also:
- -XX:MaxPermSize=128m
- -XX:+HeapDumpOnOutOfMemoryError
- -XX:HeapDumpPath=<path to logging folder>
End installation
- Click on Next
- Click on Next
- Click on Install:
Installing from properties file
You have another option if you don’t want to re seize all options on each installation. After each installation, a file called “ant.install.properties” is writed. This file contains all seized properties.
For using this properties file “ant.install.properties” for further installations you have to copy it in the folder from which you launch the installer.
To make the installer use it:
<JAVA_HOME>\bin\java –jar <Path_To_Installer>\ubik-server-installer-<VERSION>.jar text-auto
You will be asked:
Installation configuration found. Load the existing configuration?
- Answer yes.
Example of a generated “ant.install.properties” file:
### Ant Installer - properties auto generated on Mon\ Aug\ 20\ 09\:45\:32\ CEST\ 2007

basedir = D\:\\tmp\\.
ant.install.config.version = 0.0


## Properties from Page:splash

## Properties from Page:intro

## Properties from Page:license

## Properties from Page:properties
# .DirectoryInput
INSTALL_DIRECTORY = D\:\\console-batch
# .UnvalidatedTextInput
CONSOLE_ID = Console4005

## Properties from Page:properties
# .UnvalidatedTextInput
CONSOLE_JNDI_NAME = Console
# .ValidatedTextInput
NAMING_SERVICE_PORT = 5001
# .ValidatedTextInput
JMX_SERVICE_PORT = 5002

## Properties from Page:selector
# .UnvalidatedTextInput
DB_USER = console_batch4
# .UnvalidatedTextInput
DB_PASSWORD = console_batch4
# .LargeSelectInput
DB_DRIVER_CLASS = oracle.jdbc.OracleDriver
# .UnvalidatedTextInput
DB_URL = jdbc\:oracle\:thin\:@<DB Host>\:1529\:<DB INSTANCE>

## Properties from Page:properties
# .UnvalidatedTextInput
BAR_SERVER_HOST = localhost
# .ValidatedTextInput
BAR_TRANSFER_PORT = 5003
# .DirectoryInput
BAR_UPLOAD_DIRECTORY = D\:\\console-batch\\bar-upload-directory

## Properties from Page:properties
# .DirectoryInput
LOG_DIRECTORY = D\:\\console-batch\\logs

## Properties from Page:properties
# .UnvalidatedTextInput
MAIL_HOST = <Mailer IP>
# .ValidatedTextInput
MAIL_PORT = 25
# .UnvalidatedTextInput
MAILER_NAME = CB4005
# .UnvalidatedTextInput
ADMINISTRATOR_MAIL = admin@foo.com
# .SelectInput
MAIL_MANAGER_TYPE = salto.batch.system.MailManagerDBStore

## Properties from Page:properties
# .UnvalidatedTextInput
SERVICE_NAME = ubik-batcher
# .DirectoryInput
JAVA_HOME = D\:\\JDKs\\jdk1.5.0_12
# .UnvalidatedTextInput
JAVA_OPTS = -Xms256M -Xmx512M -XX\:MaxPermSize\=128m -DLOG_ROOT_PATH\=D\:\\console-batch\\logs

## Properties from Page:selector
# .TargetInput
install = true
# Targets selected for page
selector-targets = install,

## Properties from Page:progress
# Targets selected for page
progress-targets = cleanuptarget,
After installation
Copy all common libraries to folder <INSTALL_DIR>\business\lib
Test installation
- Go to <INSTALL_DIRECTORY>/bin
- Run console.bat or console.sh
- The JMX URL will be written in <INSTALL_DIRECTORY>/config/jmx-service-url.txt
- If the server does not stop, your installation is OK. You can now register the service by running:
<INSTALL_DIRECTORY>/bin/installConsoleBatchService.bat
- If the server stops, see errors logs
Batch Server Uninstallation steps:
Go to <INSTALL_DIRECTORY>/bin
Run uninstallConsoleBatchService.bat
Batch Server Configuration options:
General configuration
This configuration is in file <INSTALL_DIRECTORY>/config/config.properties
Configuration parameters:
| Paramter | Description | Default Value |
| CONSOLE_ID | Unique ID Of the Batch Server | See 1.2.2.4 |
| INSTALL_DIR | <INSTALL_DIRECTORY> | See 1.2.2.4 |
| com.salto.console.PLUGIN_MANAGER_STORE | Type of storage for Plugins configuration | salto.batch.system.PluginManagerXMLStore |
| PLUGIN_MANAGER_FILE | Path to the file that contains general plugin | <INSTALL_DIRECTORY>/config/plugin-manager.xml |
| LOCK_DIR | ||
| CONFIG_ROOT | Path to configuration Folder | <INSTALL_DIRECTORY>/config |
| CONFIG_ROOT_BATCH | Not Used | |
| CONFIG_DATA | Not Used | |
| OUTPUT_DATA | Folder used temporarily for Mail Generation and Lifecycle state | <INSTALL_DIRECTORY>/output |
| USER_FILE | File that host JMX Authentication informations | |
| com.salto.console.MAIL_MANAGER_STORE | Type of Storage for Mail Manager | salto.batch.system.MailManagerDBStore (see 1.2.2.9) |
| MAIL_MANAGER_FILE | Used only if Storage is XML | |
| JMX_HTTP_ADAPTOR_PORT | Port of the HTTP JMX adaptor if ACTIVATE_HTTP_ADAPTOR is true | |
| ACTIVATE_HTTP_ADAPTOR | JMX interface that exposes Operations in a Browser (Do not activate in PRODUCTION) | false |
JMX connectivity
This configuration is in file <INSTALL_DIRECTORY>/config/config.properties
This configuration is done by Wizard Installer (see 1.2.2.5)
Configuration parameters:
| Paramter | Description |
| JNDI_NAME | JNDI Name that will appear at the end of the JMX URL |
| JMX_SERVICE_PORT | JMX Port that will appear in the URL (It must be free) |
| NAMING_SERVICE_PORT | Naming service Port
that will appear in the URL (It must be free) |
service:jmx:rmi://<HOST OF THE MACHINE>:<JMX_SERVICE_PORT>/jndi/rmi:// <HOST OF THE MACHINE>:<NAMING_SERVICE_PORT>/<JNDI_NAME>
Database connectivity
This configuration is in file <INSTALL_DIRECTORY>/config/datasource.xml
Mailer connectivity
This configuration is in file <INSTALL_DIRECTORY>/config/mail.xml.
This configuration is done by Wizard Installer (see 1.2.2.9)
Configuration parameters:
| Parameter | Description | Default Value |
| mailHost | Host of the Mail Server | |
| mailPort | Port of the Mail Server | 25 |
| Mailer | Name that will appear in Sent mails |
Logging configuration
This configuration is in file <INSTALL_DIRECTORY>/config/log.properties.
Logging is based on Log4j, and this file controls the Server log level. Batch Logging configuration is hosted in each BAR
See http://logging.apache.org/log4j/docs/manual.html
Cold deployment
What is it
This feature enables the (re)deployment at Server Startup of one or more BARs:
- If BAR is already deployed the new version is deployed
- If BAR is not deployed, it is deployed. If file called “<BAR_ID>-binding.xml” is present it is used to customize Pools binding otherwise default mapping is used
What it does exactly
At Startup, the Batch Server will do the following:
- If BAR with another version exists, it will be undeployed
- If file <BAR_ID>-binding.xml exists in batches-cold-deploy folder it will be used
- If file <BAR_ID>-binding.xml does not exist in batches-cold-deploy but exists batches-deploy it will be used
- Otherwise a default binding that maps logical to same physical name will be created
- The BAR will be deployed
- If it succeeds:
- It will appear in deployed BARs on BatchAdmin application
- Success will appear in Deployment History on BatchAdmin application
- If it fails:
- old BAR (if there was one) will be undeployed
- New BAR will not be deployed and moved to batches-deploy-failure and a file called <BAR File Name>.failure will be written that will contains the Failure
- Failure will appear in Deployment History on BatchAdmin application
How To
To do this:
- Put the bar in folder “<INSTALL_DIRECTORY>\batches-cold-deploy”
- Put a file called “<BAR_ID>-binding.xml” where BAR_ID is the <display-name > in bar.xml to customize JNDI Mapping (see next paragraph)
JNDI Mapping Customization
If you have to customize the mapping of JNDI resources (Pools), example map jdbc/masterdatas to jdbc/masterdatas_beta, you must put in the folder “<INSTALL_DIRECTORY>\batches-cold-deploy” a file called “<BAR_ID>-binding.xml” where BAR_ID is the <display-name > in bar.xml.
Example: If your BAR_ID is “STCOM_BATCH”, you will put a file called STCOM_BATCH-binding.xml that contains:
<?xml version="1.0" encoding="UTF-8"?>
<!DOCTYPE bar-resources
     PUBLIC "-//Ubik-Ingenierie //DTD BAR Binding Resource Configuration 1.0//EN"
     "http://www.ubik-ingenierie.com/consolebatch/config/bar-binding.dtd">
<bar-resources>
<bar-resource nameinbar="jdbc/masterdatas" boundname="jdbc/masterdatas_vbeta" />
<bar-resource nameinbar="jdbc/stcom" boundname="jdbc/stcom" />
</bar-resources>
Batch Administration Webapp:
This section explains the installation of the Web application that controls one or more Batch Servers.
The application comes as a standard EAR to deploy on J2EE 1.3 or J2EE 1.4 server.
Configuration includes:
- Creating the application Database (Separated from Batch Server database)
- Configuring the BAR Upload directory used by this application, this directory holds the BARs that are further sent to one or more batch servers. This directory must be different from directories used by the Batch Servers
- Once installed, add batch servers to make them visible for administration
Database configuration:
Create the Database
Run the script adapted to your database, all databases supported by Hibernate can be used:
- DB2
- Oracle 9i
- Oracle 10G
- Sql Server 2005
- Postgres 8.x.x
- MySQL
- ...
Run the following script in the Database of BatchAdmin:
INSERT INTO parameter(par_context, par_id, par_value, par_description, par_date_upd, par_user_upd, par_date_crt, par_user_crt)
VALUES ('BAR_UPLOAD', 'DIRECTORY', '<PATH TO BAR UPLOAD DIRECTORY>',
'Directory where uploaded BARs in deployment will be stored', SYSDATE, 'PMD', SYSDATE, 'PMD');

INSERT INTO parameter(par_context, par_id, par_value, par_description, par_date_upd, par_user_upd, par_date_crt, par_user_crt)
VALUES ('CONSOLE_SERVICE', 'IMPLEMENTATION', 'com.ubikingenierie.console.connect.service.JMX',
'Service implementation type', SYSDATE, 'PMD', SYSDATE, 'PMD');
commit;
Where <PATH TO BAR UPLOAD DIRECTORY> is the path to a directory where BARs will be uploaded before deployment on servers (This is NOT the same one as the directory used by the BATCH Server)
Available roles
| Task name | Role | Description |
| DEPLOY | ADMINISTRATOR | Ability to deploy/undeploy/redeploy a BAR |
| DURATION_CONFIGURATION | ADMINISTRATOR, SUPERVISOR | Ability to set max duration limits of a Batch |
| MAIL_CONFIGURATION | ADMINISTRATOR, SUPERVISOR | Ability to add/remove Mail recipients |
| MANAGE_CONSOLES | ADMINISTRATOR | Add, Remove, Update a Console connection in the BatchAdmin application and Start/Stop a Server |
| MANAGE_LOGGING | ADMINISTRATOR, SUPERVISOR | Ability to view loggers, change log levels |
| MANAGE_BATCHES | ADMINISTRATOR, SUPERVISOR | Ability to modify Batches configuration, |
| MANAGE_LAUNCHES | ADMINISTRATOR, SUPERVISOR | Ability to manage Launches configuration, Add/Remove Cron Triggers |
| MANAGE_LINKERS | ADMINISTRATOR, SUPERVISOR | Ability to see Linkers |
| MANAGE_TRIGGERS | ADMINISTRATOR, SUPERVISOR | Ability to Add/Remove/Modify Cron Triggers |
| POOL_CONFIGURATION | ADMINISTRATOR | Ability to add/remove/update a Pool |
| POOL_VIEW | ADMINISTRATOR, SUPERVISOR, GUEST | View Pools configuration |
| VIEW_BATCH_ERRORS | ADMINISTRATOR, SUPERVISOR, GUEST | Ability to see Batch Errors and History |
| VIEW_DEPLOY | ADMINISTRATOR, SUPERVISOR, GUEST | View Deployment History |
| VIEW_NEXT_EXECUTIONS | ADMINISTRATOR, SUPERVISOR, GUEST | View Next batches executions |
| VIEW_PREVIOUS_EXECUTIONS | ADMINISTRATOR, SUPERVISOR, GUEST | View Previous batches executions |
| VIEW_SCHEDULING | ADMINISTRATOR, SUPERVISOR, GUEST | Ability to see Running Batches |
| VIEW_INDICATORS | ADMINISTRATOR, SUPERVISOR, GUEST | View Servers Memory state and pools state |
| VIEW_SYSTEM_PROPERTIES | ADMINISTRATOR | View Server JVM properties |
Deploy the EAR batchadmin-XXX.ear.
Map the pools:
| Logical Name | Description |
| jdbc/console | Repository of the Batch Server |
| jdbc/batchadmin | Database of the application |
| jdbc/cbsecurity | This pool is used by the internal rights management system, optional if an other security system is used |
Adding a Batch Server:
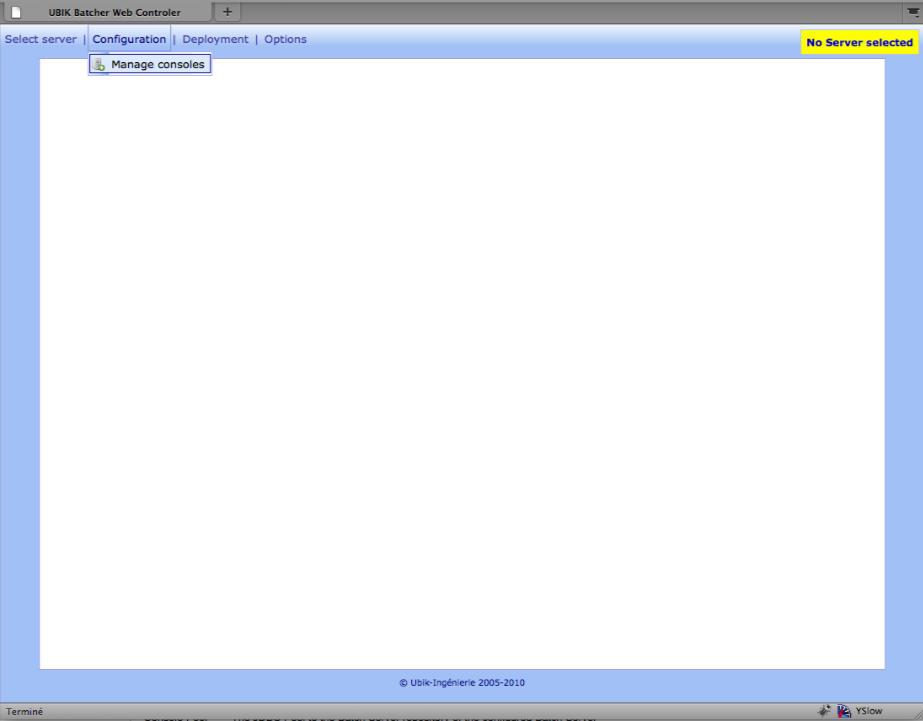
You must have the role MANAGE_CONSOLES to add a Batch server in the Administration Tool
Open menu Configuration > Manage Consoles
Add a Server
Click onFill this form
Where the parameters are:
| Parameter | Description |
| Console ID | The Console ID that identifies uniquely the Batch Server in DB |
| JMX URL | The JMX URL that was generated in <INSTALL_DIRECTORY>/config/jmx-service-url.txt |
| JMX User | The JMX login |
| JMX Password | The JMX password |
| File Transfer Host | The Host where the Batch Server is running |
| File Transfer Port | The Port of the Embedded BAR Server |
| Console Pool | The JDBC Pool to the Batch Server repository of the configured Batch Server |
| Comments | A Comment that will appear when you hover over a link |
Finish the Step
Click onAuthors
- Philippe Mouawad


